This is a short tip on how to adjust the size of the cursor box in AutoCAD. (Video at bottom of page.) The cursor changes based on what you are doing in AutoCAD. When AutoCAD is first loaded, these are quite small. Whether you have a hard time seeing them or maybe your carpal tunnel makes it hard to so finely move the mouse for item selection, this is going to help make it easier to use AutoCAD.
The “Pickbox” is the small white box within the crosshair. This is what you see the majority of the time as you work in drawings. It is the base cursor. You can even adjust the length of the lines in the crosshair. If a command is activated, the crosshair is removed and all you see is the pickbox.
The “Aperture” is an invisible box around the pickbox cursor. This is used for the Object Snap. The snap engages once the point passes inside this invisible box. The smaller the box, the closer you have to get to the point for it to snap.
There is the “AutoSnap Marker”, which is the green box that shows up when your cursor snaps onto an Object Snap point. This will change shape based on the type of object snap you are snapping to. For example: an endpoint is a square and a midpoint is a triangle.
The “Grip” is the blue boxes that show up after selecting an object. They typically show up at the endpoints, midpoints, quadrants, and centers.
As with most things, AutoCAD has a command to adjust each of these. Each of these have their own scales. If you use this option, take note of the current number in < >, just in case you don’t like what you change it to, as the Undo command doesn’t always fix things.
| PICKBOX | (0-50) |
| APERATURE | (1-50) |
| AUTOSNAP | (0-63) |
| GRIPSIZE | (1-255) |
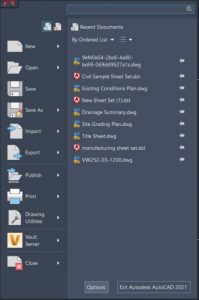
While most people might be able to guess these or pick from the autofill, they wouldn’t know these commands were available. The most known way to access these are in the Application Options dialog. If you don’t know, you can get to this dialog by opening the “Application” menu and clicking the “Options” button at the bottom right. One could also type “OPTIONS” into the command line or navigate to the expand arrow on the “Interface” panel of the “View” tab on the ribbon.
The first two boxes that I want to talk about can be adjusted on the “Selection” tab. At the top you will find a slider bar for the Pickbox size and the Grip size. Click and drag the slider bar to adjust the box in the preview window to your desired size.

The other two boxes are found half way down on the “Drafting” tab. You can adjust these in the same manner; click and drag the slider bar.

I mentioned above that the Crosshair can be adjusted as well, so let’s go over that too. While you’re in the Options dialog, click over to the “Display” tab. A little over half way down on the right is a slider bar for adjusting the lines of the Crosshair. If you drag it all the way to the right, they will cross the entire window.

Now, with this knowledge, you can go back and adjust these settings until you get it just right.


Leave A Comment