

Bluebeam Revu: Compare Documents vs. Overlay Pages
Today, I would like to show you the inherent differences and applications for the Bluebeam Revu commands Compare Documents & Overlay Pages. Both have somewhat similar outcomes, but behave fairly differently. It is mostly dependent upon what information you are needing to see at the end of the process that will help you chose which one to use, and when.
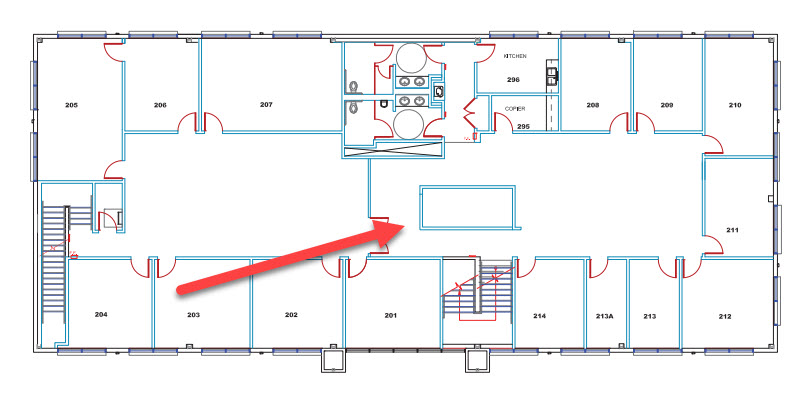
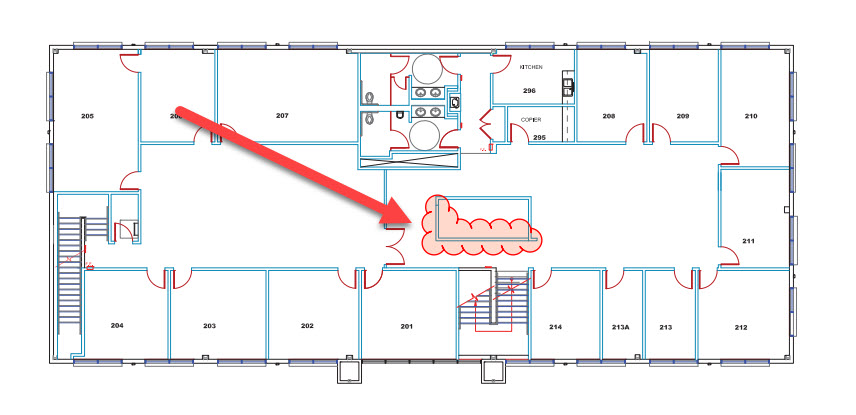
To begin, let’s take a look at the PDF’s I will be using for these examples. Here is our first drawing; nothing really out of the ordinary.

But, in this second image, notice the extra linework I added to the drawing. This is the difference we will use Bluebeam Revu to highlight for us.
Compare Documents
First, we will begin with looking at the process of Comparing Documents. Compare Documents allows you to see where differences occur between two PDFs. As we move along you will see what makes this command unique.
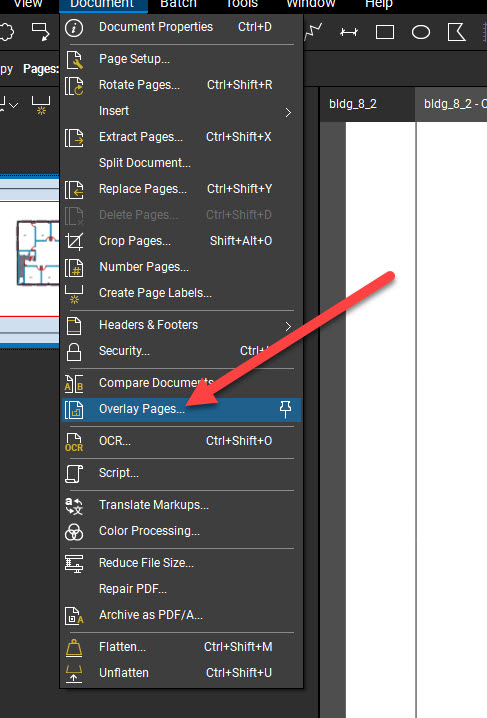
Begin by going to your Document Menu in the Command Bar and select Compare Documents.
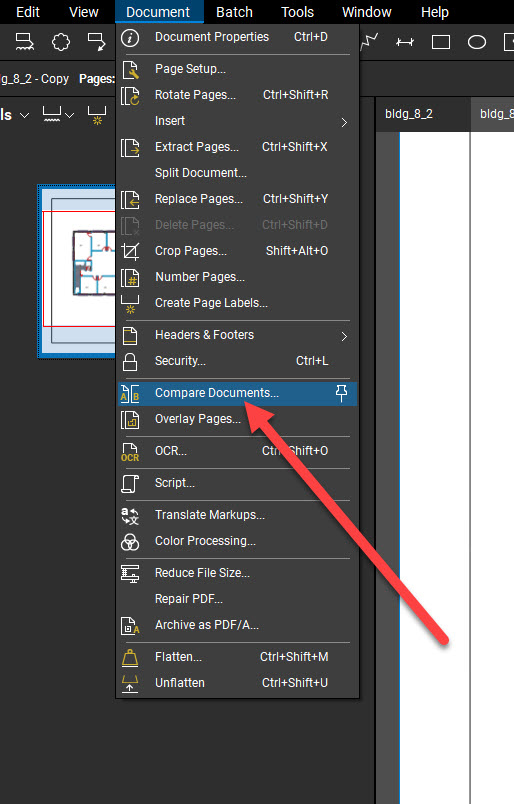
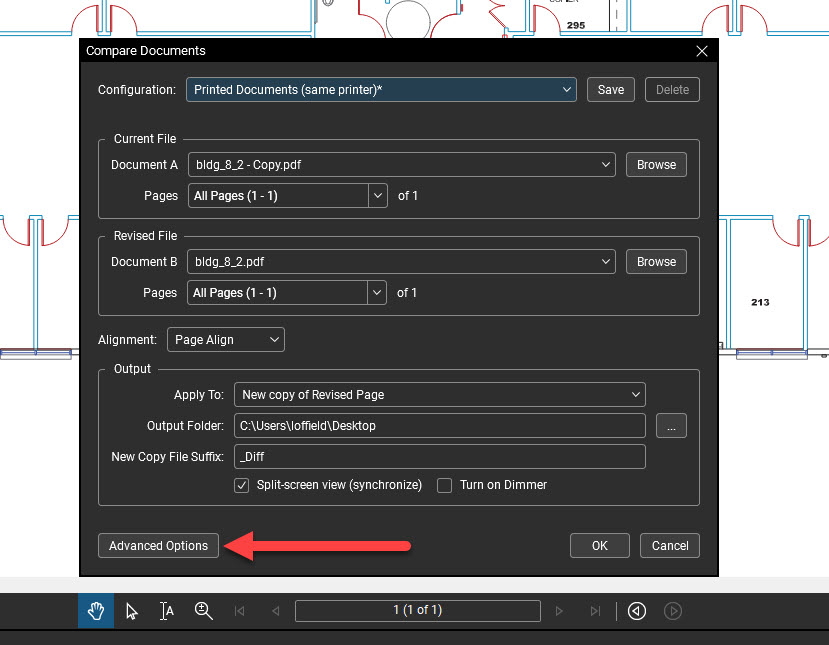
Once this command is selected, it brings up a dialog where we can choose the options for how the command will be carried out. If you have two documents already open, it will select them by default. You can see the names of the documents listed. Just make sure you have them in the right spot for “current” and “revised.” Click on Advanced Options to dig a little deeper and gain a little insight as to how this command will highlight differences for us.
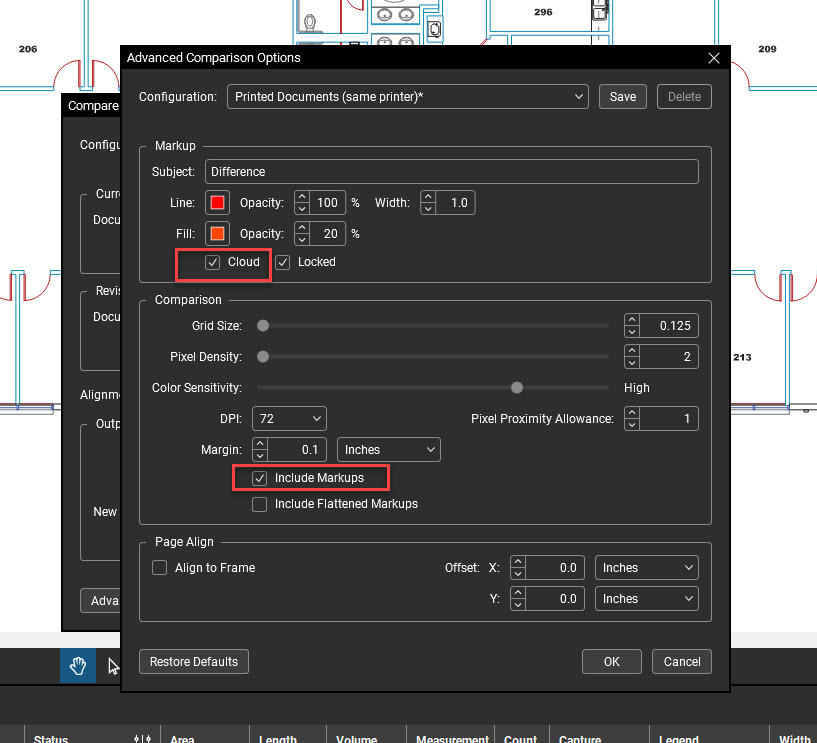
After selecting Advanced Options, we can see that Revu is going to display the differences in the documents by using a Cloud Markup. I have adjusted the settings to use a red cloud with an orange fill of 20%. Notice, toward the bottom of this box, there is a checkbox that, when selected will include any markups that already exist on the page (keep this in mind for later).
With our settings selected, click OK to finalize the command. Our results look like this:
You can see how the cloud, set just how I dictated in the settings, encircles the differences in the linework of the drawings. This lets Bluebeam do the work for you and you don’t have to scan over a page, especially one much more detailed than this, to locate differences in drawings. If there were markups on the page as well, if they differed from one document to the next, they would also be signified by a cloud markup.
Overlay Pages
Next, we will look at the process of Overlaying Pages. Overlay Pages allows you to see what the differences are between two or more PDFs. What makes this command different, is it is purely concerned with the linework of the PDF, not the markups. So, this is a great way to check one version of a drawing with updated versions to easily spot the differences.
Again, go to the Document Menu and select Overlay Pages.
When the options window opens, you really get an idea of how streamlined Bluebeam has made this process. You can add two or more pages for the overlay process, and you can edit what primary color gets used for each page by clicking Edit Defaults. This preview pane at the bottom of the window is a new feature from the last update. Very handy indeed. You can check your work before actually completing the command.

There are a few ways you can make sure the linework of the drawings lines up as well. This dropdown has three different options to select:
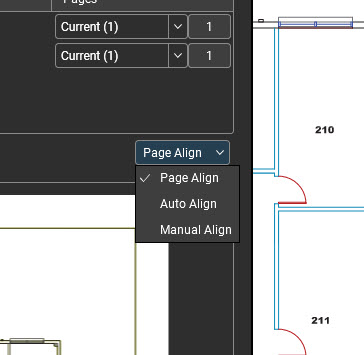
- Page Align: Revu places your PDFs directly on top of each other. Recommended for drawings that have minor revisions but are otherwise the same in terms of scale and position on the page. This is the default option.
- Auto Align: Revu automatically finds points of alignment between your PDFs. Recommended for drawings that vary in size and scale.
- Manual Align: Revu allows you to select three points that will act as anchor points between the drawings. You must select the same three points in the same order for all your selected drawings. Recommended when Auto Align doesn’t work as intended.
Click OK to finish the command and view your results.
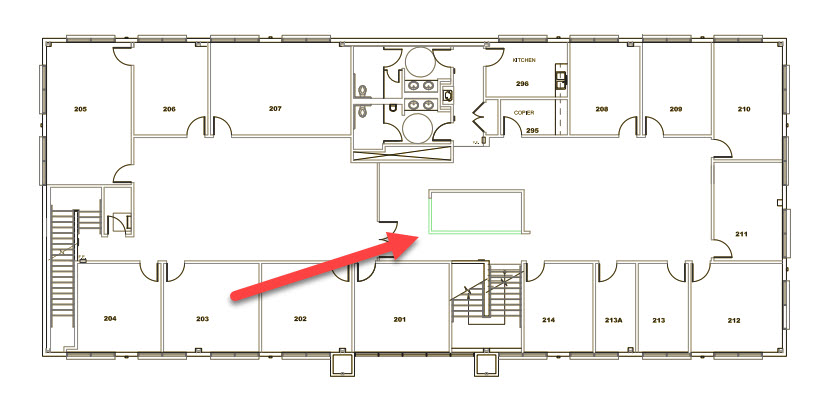
Notice how, where the linework (and the colors) matches up, it displays black. But, anywhere where linework is missing/added, it shows the color selected for a specific page. Again, a very easy way to spot differences in pages. Perfect for easily finding the differences in updated drawings.
Both, Compare Documents and Overlay Pages, are great tools it mostly depends on what you’re looking for and how you want that information displayed. If you’d like a little more info on these items, be sure to check out Bluebeam’s Technical Support Article. Also, while you’re here, take a look at my recent post about Creating Custom Line Styles in Bluebeam Revu.
Thanks for reading!
-Luke
![]()

Leave A Comment