![]()
Bluebeam Revu 21: Text Editing
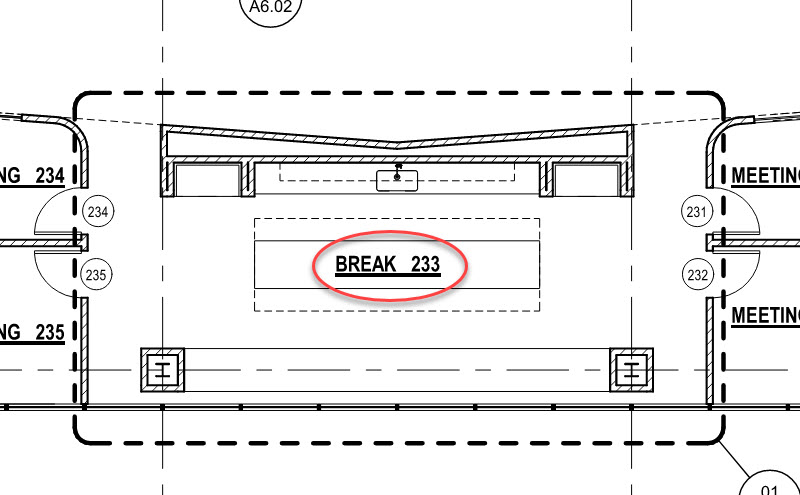
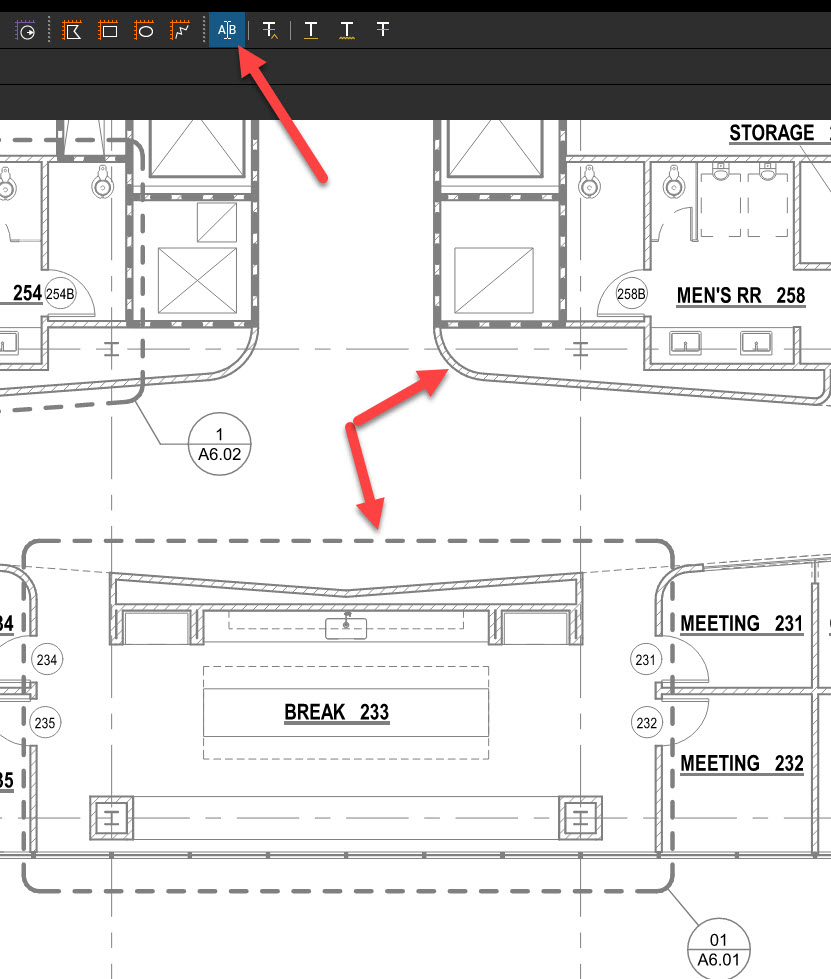
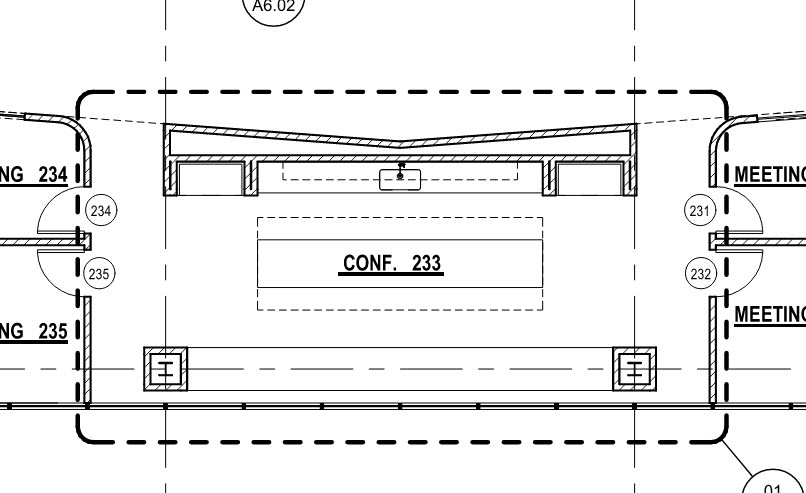
Editing the text that resides within a PDF can be quite simple when working within Bluebeam Revu 21. Let’s take a quick look at the ways this function can be accessed. Let’s say, for instance, that this Break Room has now been changed to a Conference Room and now the PDF needs to be updated to reflect this change.
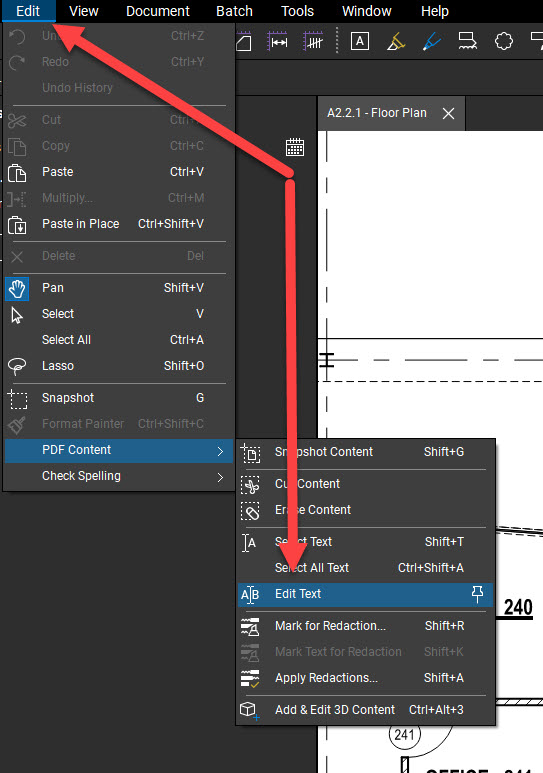
There are two different ways to find the Text Edit command. Here’s how we find the first location: Edit > PDF Content > Edit Text.
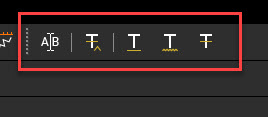
The next spot where this command is also located can be found by making sure your Advanced Text toolbar is turned on.
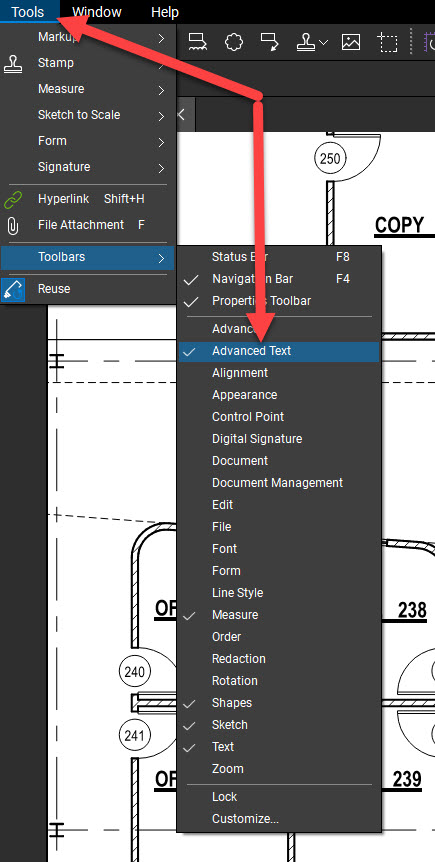
You will easily be able to tell this toolbar is turned on because it will show up next in line with the other toolbars you have activated.
Once you have the Edit Text command active, you will notice a change in how the PDF is displayed within the workspace. All of the other linework that is NOT text within the PDF will become greyed-out.
There are some things to keep in mind once the Edit Text command is active:
- Press the INSERT key to toggle between inserting (default) and overwriting text.
- To add text, click the desired location and enter text with the keyboard. Revu will automatically recognize and match the font, style and size, or you can use the
 Properties tab to adjust these settings.
 - To delete text, click and drag your cursor to select the text, then press the DELETE key.
- To replace text, click and drag your cursor to select the text, then simply type to replace it.
- Press the ESC key or select any other markup to exit Edit Text mode.
 Properties tab to adjust these settings.
For all Text Editing functions, you can use the keyboard arrow keys to navigate through text and double-click to select an entire word.
It’s as simple as that! Now, Here’s what it looks like after that Break Room has been renamed to reflect the change:
Be sure to check out this Bluebeam Support Page if you want to know more about the Edit Text Function. Thanks for Reading!
-Luke

Leave A Comment