
![]()
Bluebeam Revu: Add a Photo Capture to a Markup
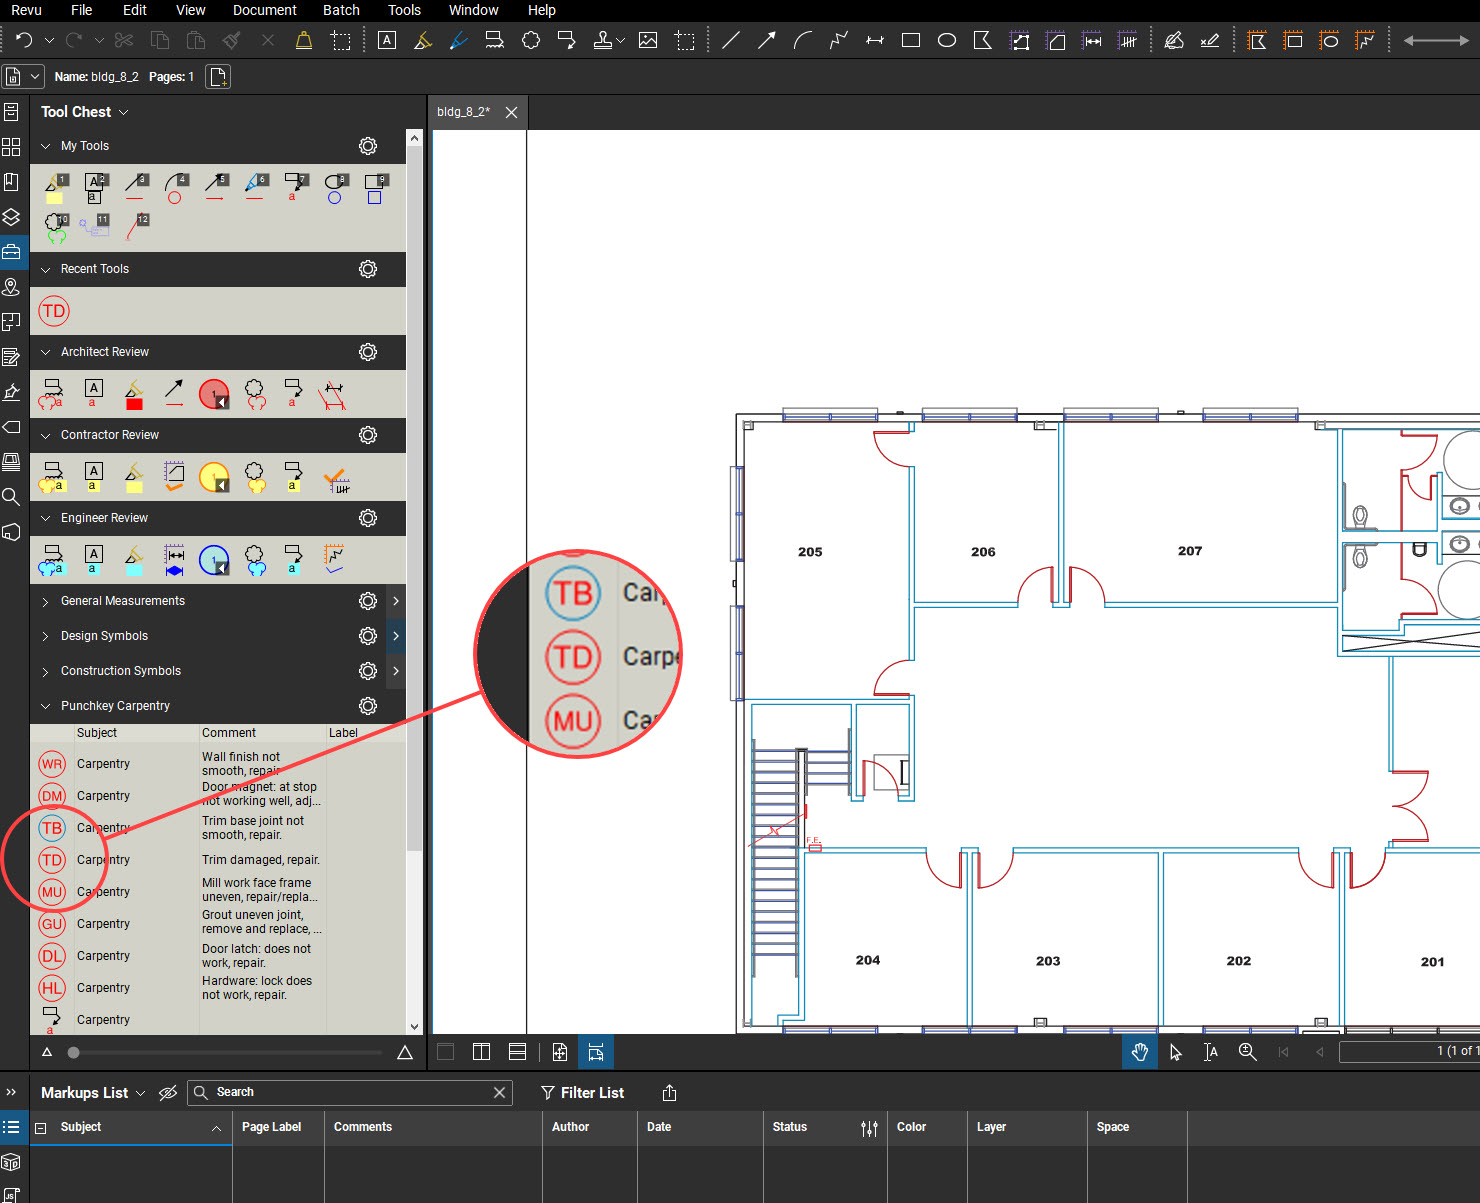
Today we will go over the steps needed to add a image file, or photo capture, to any markup within Bluebeam Revu 21. Here, I have highlighted an applicable markup for the task from the Punchkey Carpentry tool set (this tool set and many others are available for free on Bluebeam’s Custom Library page).
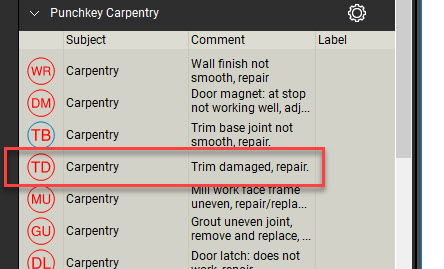
Here’s a better look at the markup and its description:
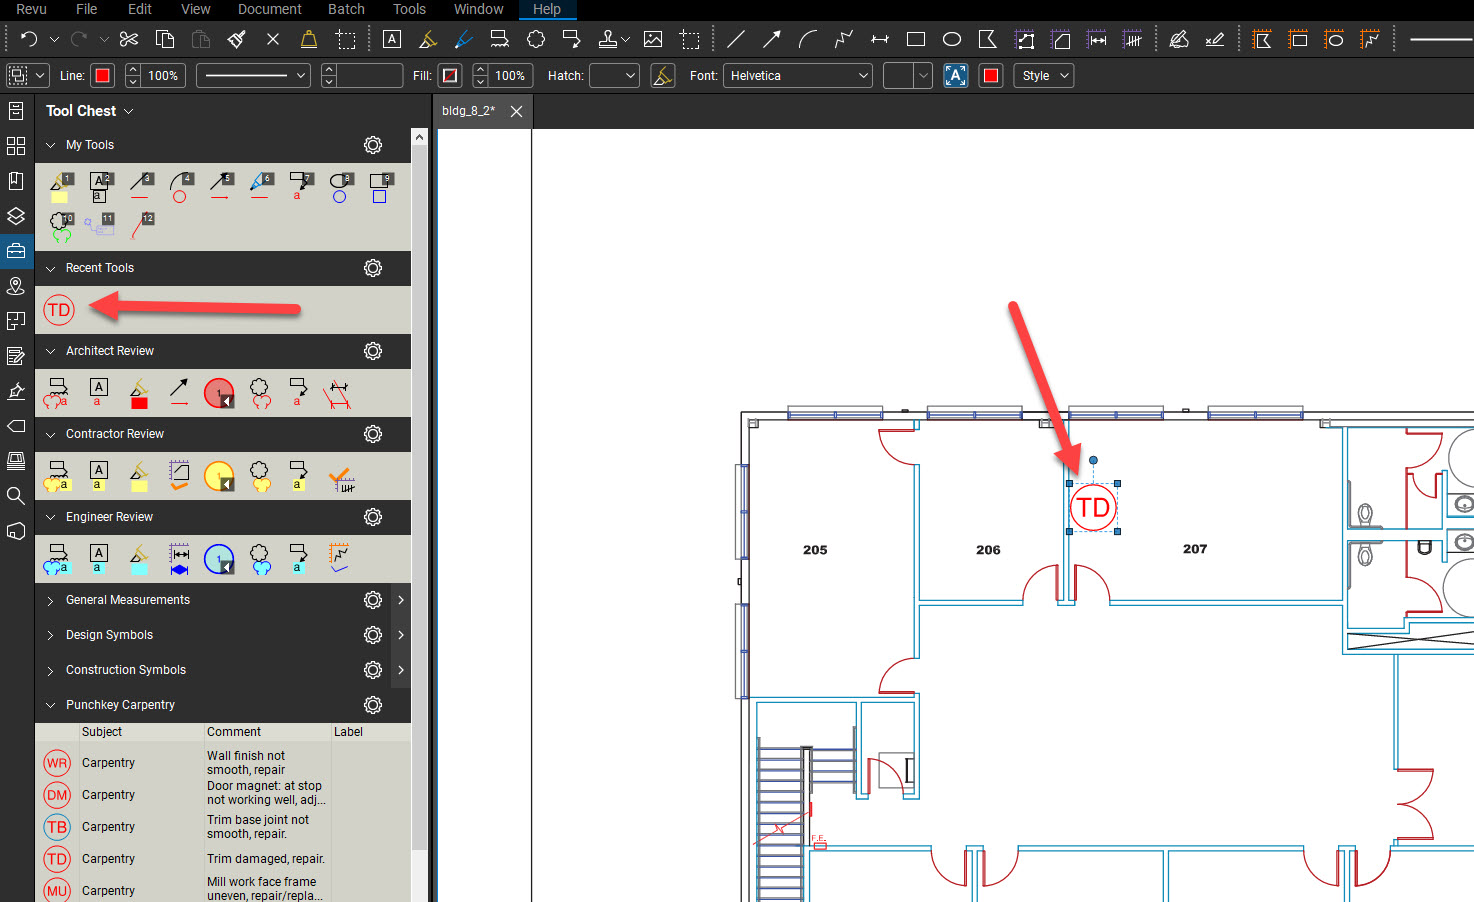
Next, we’ll place the markup where it belongs on the PDF:
Now, to get full use out of this markup, and really show the damage it applies to, we have the ability to attach, or capture, an image that will be assigned to the markup. Simply right-click on the markup to get started.
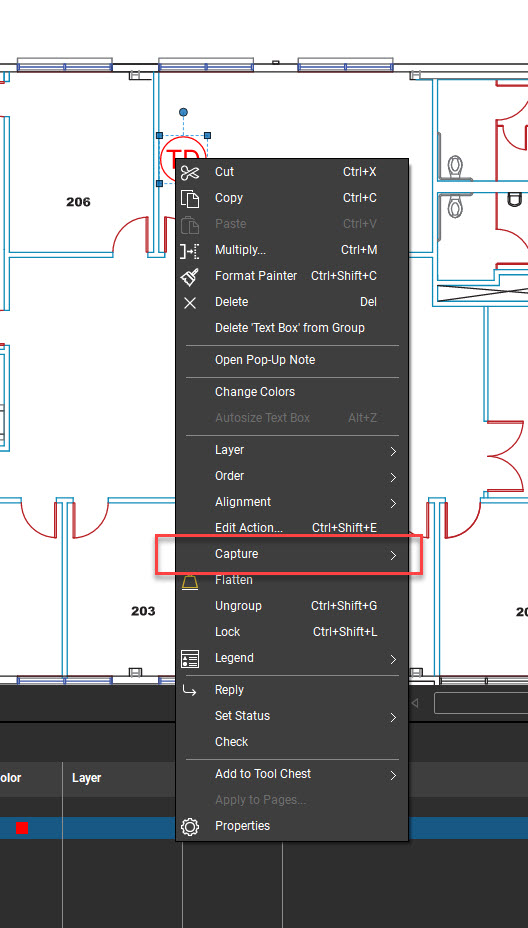
After right-clicking, this menu appears. Hover over capture to view the options we’ll need next:
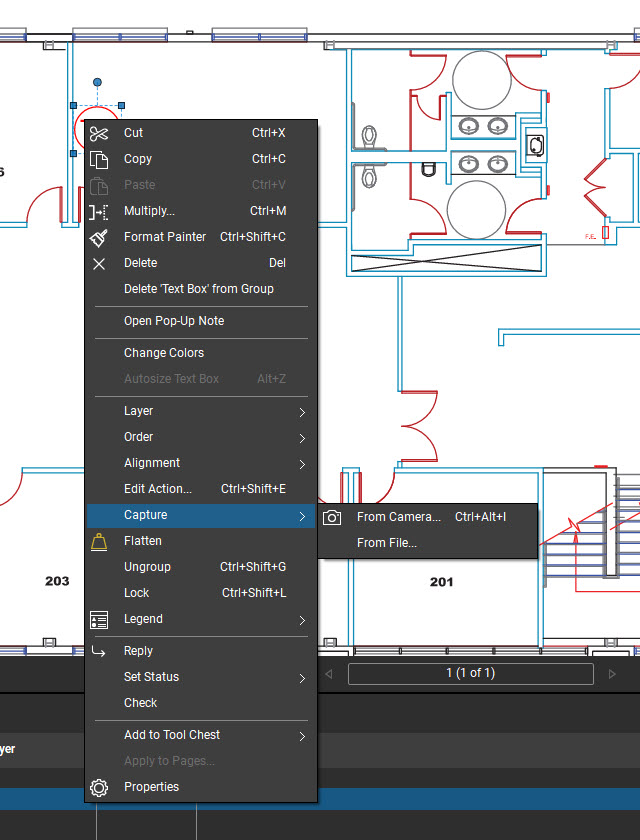
Here, two more selections become available. If we are using a tablet or phone, you can select From Camera (although this will select your webcam as well if you’re on your PC). If you already have the image on your computer or device and simply want to navigate to it, select From File. Selecting the latter will bring up a window to navigate to the image:

Then, all you’ll need to do it find your way to the image you wish to assign to the markup and click Open.
You can tell it has now attached the image file to the markup because the symbol for the markup on the PDF now has changed:
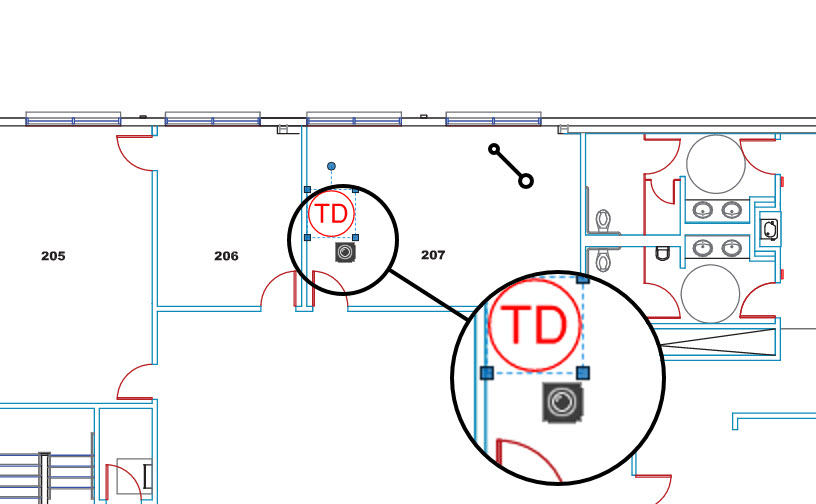
Note the little camera icon that is now a part of the markup. If we left-click on that camera icon, we are given even more options:
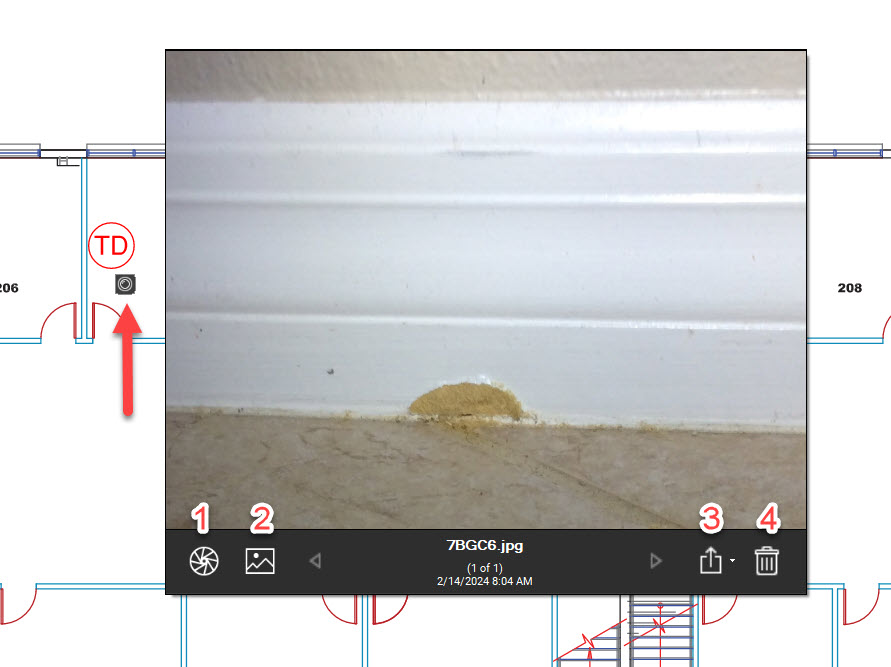
Not only do we get to view the image, we get a few other options as well. I have them numbered on the image and will describe them below.
- The button allows you to take more images that will also be attached to the markup.
- This allows you to navigate to, and attach more image files to the markup.
- Here, you can export the image file to another location.
- This will delete the image currently being viewed from the markup.
I hope this gives you a better understanding of the Capture function. Bluebeam Revu is truly all about getting the correct information across the first time. The correct markups when matched up with other information, including images or replies (maybe we’ll hit that one up next), will always ensure you and your team have the most important and current information front and center.
Thanks for reading! In case you missed it, be sure to see my post showing the differences between Vector and Rastor PDF’s.
-Luke


Leave A Comment