
Accessing the contents of you Bluebeam Tool Sets could not be any easier! Here, I will describe the steps you’ll take to send your Tool Sets to the Bluebeam Cloud as well as how to Share your Tool Set via the export/import function.
Send Revu 21 Tool Sets to the Bluebeam Cloud
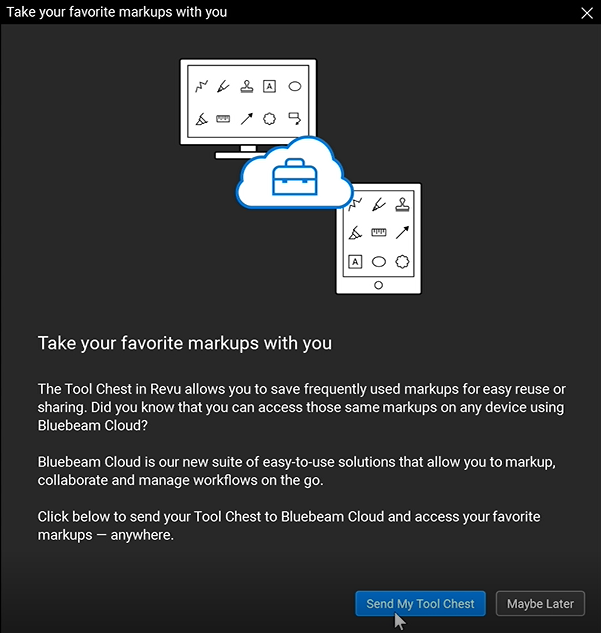
If you are signing in to Revu 21 for the first time, you’ll initially see a message about this new feature that will allow you to sync your Revu tool sets with Bluebeam Cloud, making them available on both platforms. To access this function, simply select Send My Tool Chest in the message dialog box as seen below:
Alternatively, you can also select Maybe Later and send it to the cloud at any point when you are ready.
Access Send My Tool Chest at a later time
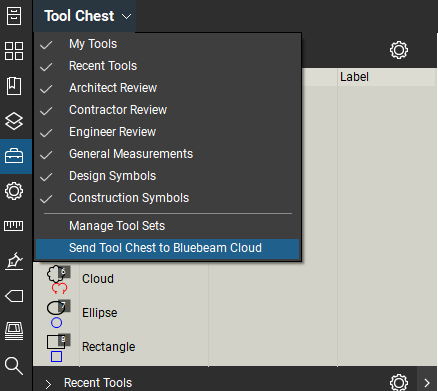
When you have your tool sets ready, you can easily sync them with Bluebeam Cloud. Simply follow these steps:
- Sign into Revu 21
- Open the Tool Chest panel
- Select Tool Chest > Send Tool Chest to Bluebeam Cloud
You will then receive a notification that your tool sets have been sent to Bluebeam Cloud. To access them, select Open Bluebeam Cloud. The dialog box will look like this:
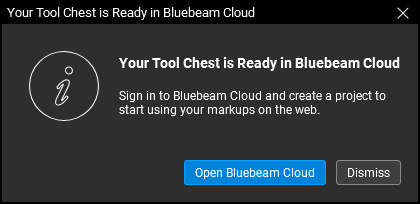
However, if you choose to access them at a later time, all the tool sets with your custom markups will be available the next time you open your tool chest in Bluebeam Cloud.
Export/Import Tool Sets
Next, I will describe the steps necessary to export & import your tool sets within Revu 21. You can export tool sets, save them locally to your device, import them, or even share the tool sets with anyone!
Export a tool set
- Open the Tool Chest
- Select Properties for the tool set you want to export, and then select Export
- Select the location where the file will be stored, and choose Save
Then, after you have exported the tool set, simply add or import it to your Tool Chest.
Add & Import a shared tool set
To add a shared tool set:
- Open the Tool Chest
- Select Tool Chest > Manage Tool Sets
- Then, choose Add
- Click the Browse button and navigate to the tool set (which will be a .btx file) and click Open
- Lastly, you will select the Display and Show in All Profiles boxes, and then click OK
To Import a tool set:
- Open the Tool Chest
- Select Tool Chest > Manage Tool Sets
- Next, click Import
- Then, navigate to your tool set’s .btx file and click OK
Additionally, you also have the ability to easily import tool set files by simply dragging them from your Windows File Explorer to the Revu window.
You also have the ability to manage tool sets to prevent them from being updated by multiple users. A lock icon will appear above a tool set indicates that no changes can be made. Likewise, a check mark icon indicates the tool set is unlocked and that changes can be made to it.
Note: Any changes made to an added tool set will be implemented for all users who share the tool set.
I do hope this information will be useful to you and your coworkers and help to integrate a more streamlined workflow for your company.
Have a great day!
-Luke


Did you just reveal that syncing Bluebeam Cloud with our Revu software can be done through the export/import feature? Nice! I’m so gonna tell my son about this so he can get the right software in no time. If you must know, his office PC needs an upgrade so he can get his daily tasks completed a lot faster.